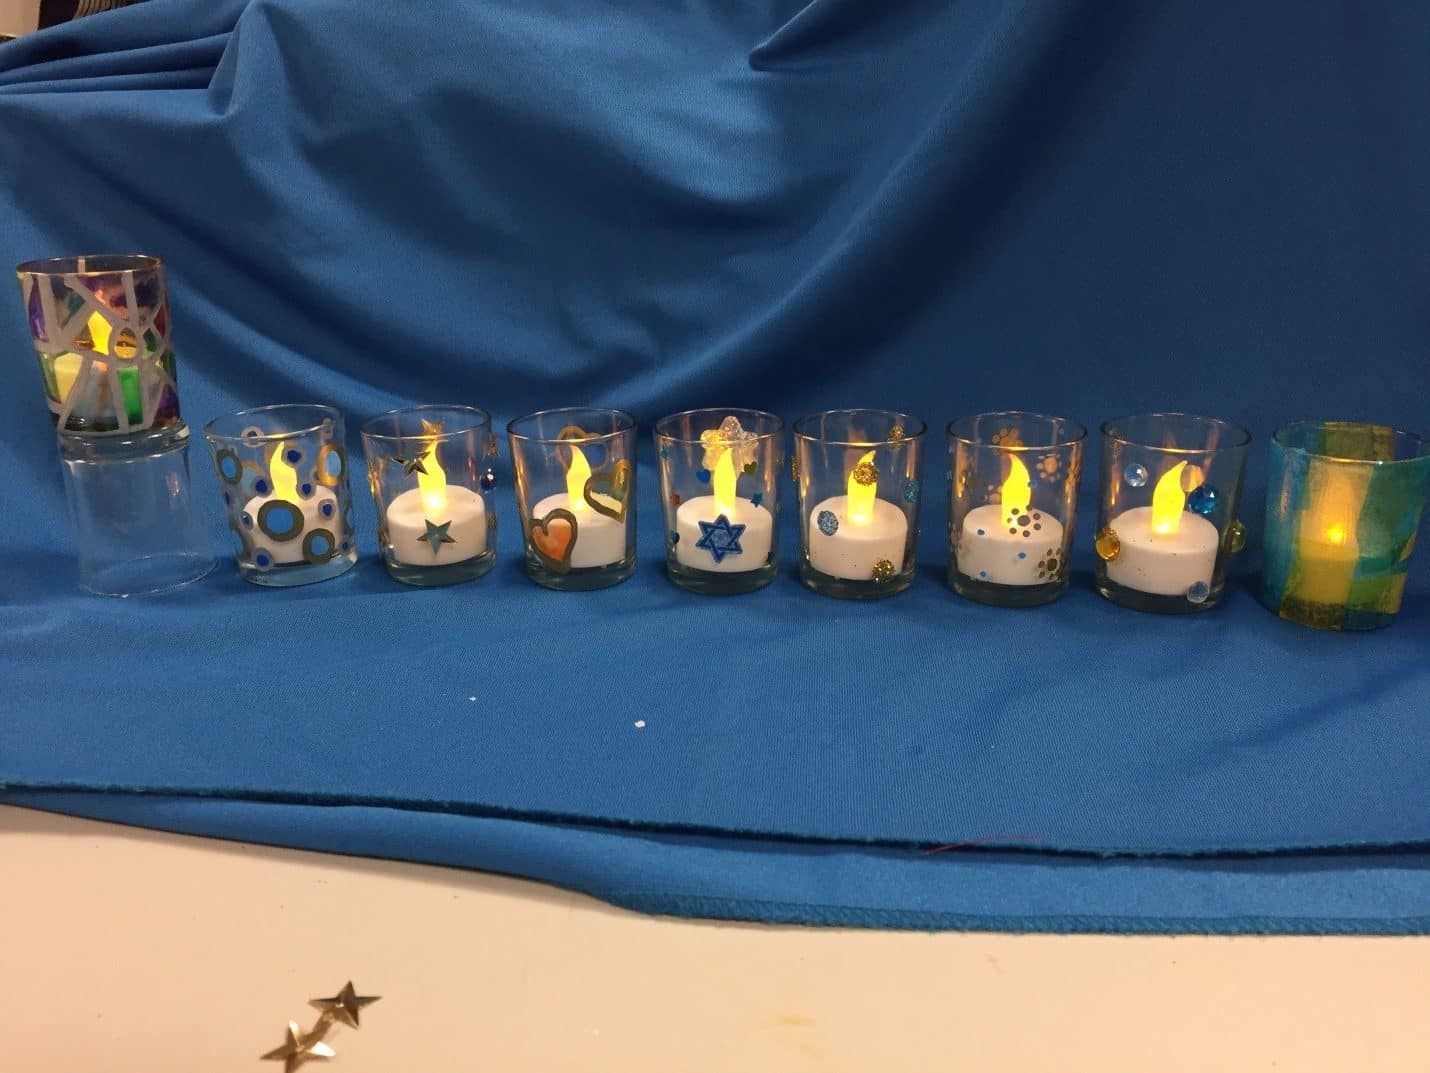
Make a Jar Menorah
You’ll Need:
- 9 glasses—see the helpful tips, below.
- 9 electric tealights (you can use the real thing, but the electric is safer for kids)
- Decoration supplies. For these, I used a variety of options:
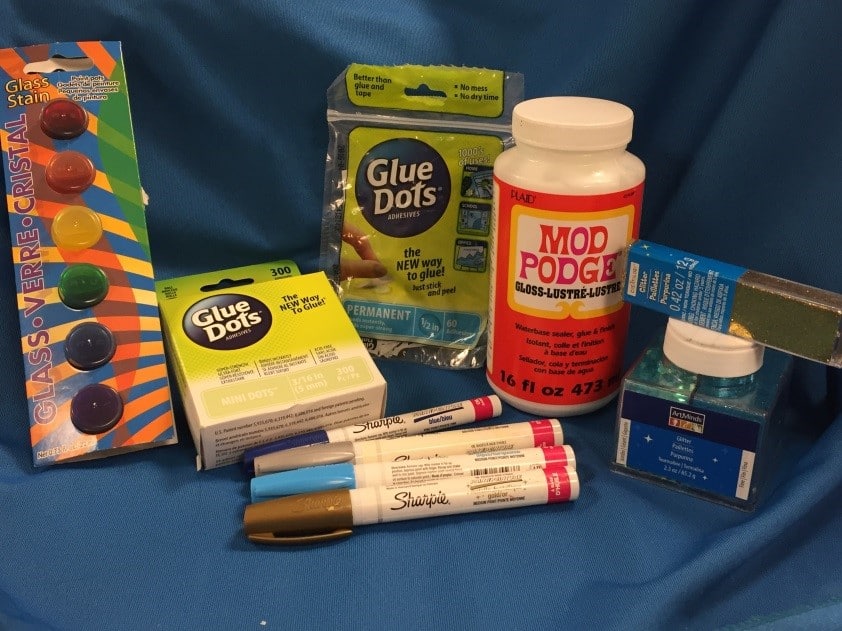
- Sharpie paint pens
- Prismatic stickers (to catch the light)
- Rhinestones
- Glue dots (I used the permanent kind for the rhinestones; I used the craft kind for the stars and the glitter)
- Fine glitter
- Sequins (like the stars pictured above)
- Glass stain (and a brush) This was made by Deco-Art
- Mod-podge (you can also use thinned out Elmer’s glue—both dry clear, but the Mod-Podge comes in the “gloss” option) and a sponge-brush to apply
- Tissue paper (you can also use recycled tissue paper from your gifts!)
Helpful Tips:
- For the glasses, these could be tea light votives, mason jars, recycled jars/bottles or more. Eight should be the same size (or close to it). The ninth is the shamash—the helper candle—and it needs to be bigger or higher than the others to set it apart. In the picture, I used a tenth candleholder flipped upside-down to have the shamash raised up.
- I purchased the votives for $.50 each at the craft store. Electric tealights can also be purchased there.
- If you use one color palette (e.g. blue, turquoise, silver and gold as shown), it will look lovely and cohesive with many artists
- You can use just one kind of technique (e.g. all decoupage or just paint markers) for all of them—these are all different to offer a variety of options.
- If you put a strip of paper inside the jar as you work, it’ll be easier to see how it’s looking. (It also keeps the finger prints down a little.)
- You should probably clean the jars with glass cleaner or soap and water to get off any excess oils or dirt before decorating.
For a more in-depth how-to on these techniques, check out these links:
- Glittered Glass Jars technique from Something Turquoise
- Paint pens technique from Attainable Sustainable
- Decoupage jar technique from Plaid Kids Crafts
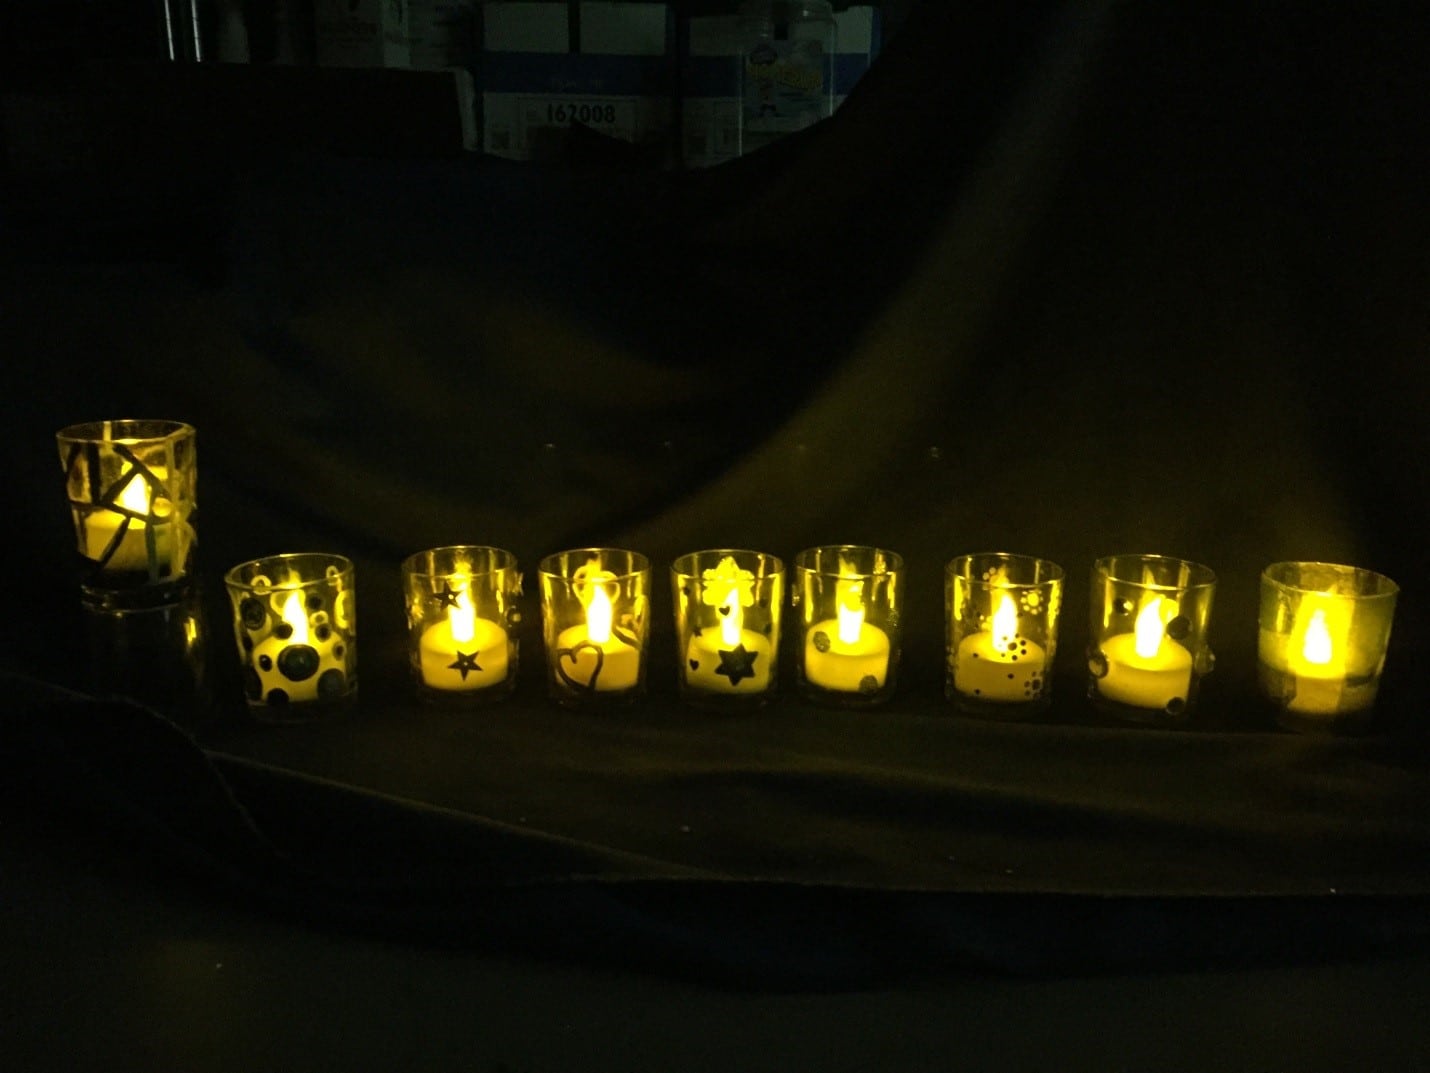
The full effect in the dark!
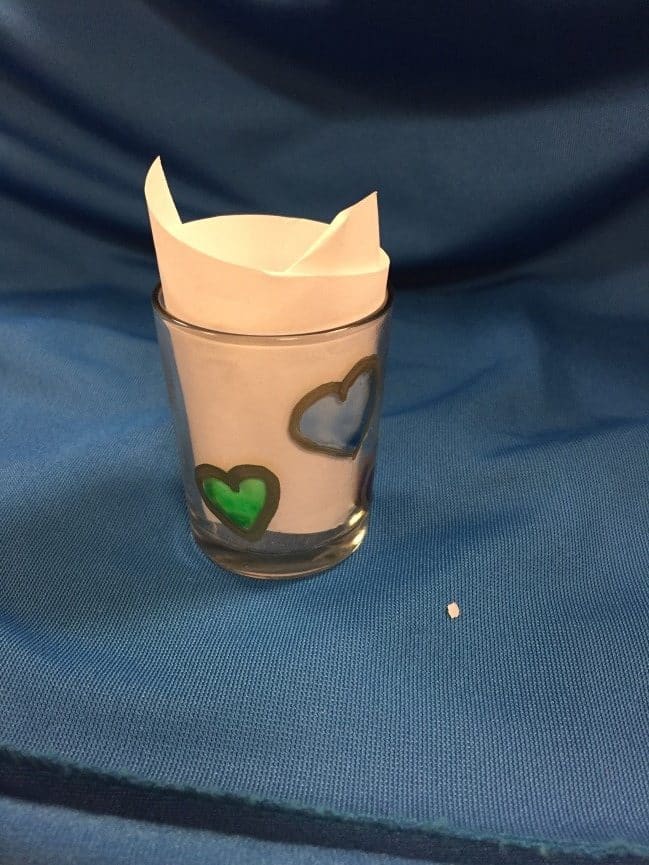 |
Glass stain + paint pen Paint the design (hearts in this example), let it dry, add a second coat, let it dry and then outlin the hearts in paint pen. |
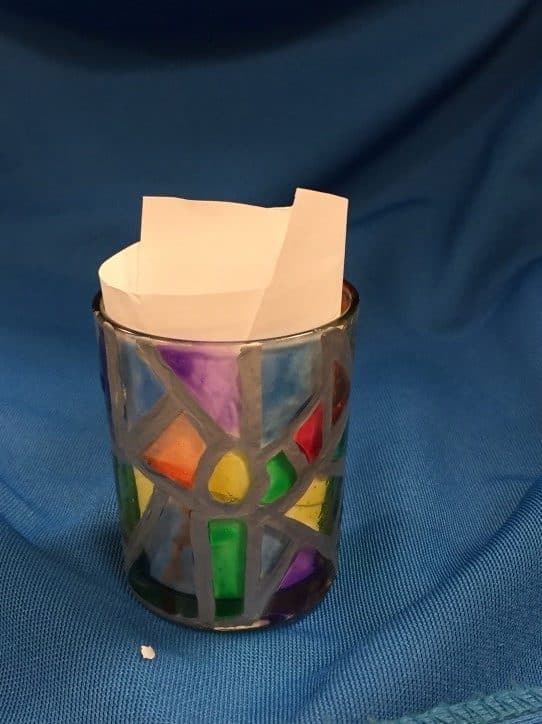 |
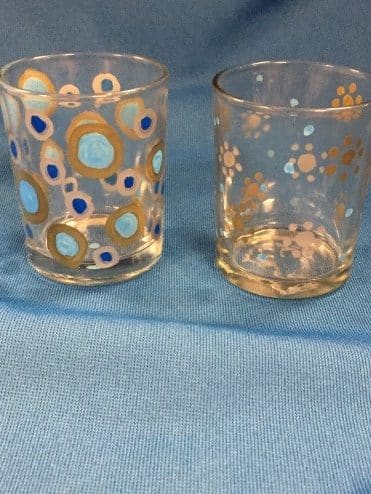
Glass stain + paint pen Draw lines free-hand with a paint pen to look like a stained glass piece—it can be abstract, or you can incorporate symbols of the holiday. Then fill in the shapes with the glass stain. After the second coat dried, go over the original paint pen lines with the same color paint pen to clean it up. |
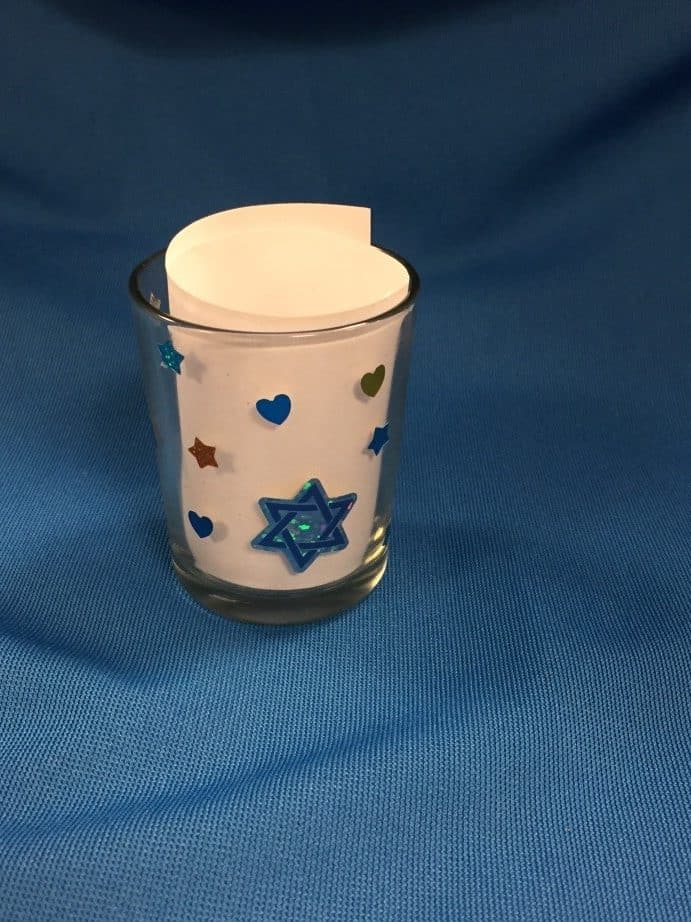 |
Stickers Use a variety of prismatic (sparkly) stickers. It’s quick, easy for little ones and has no drying time! |
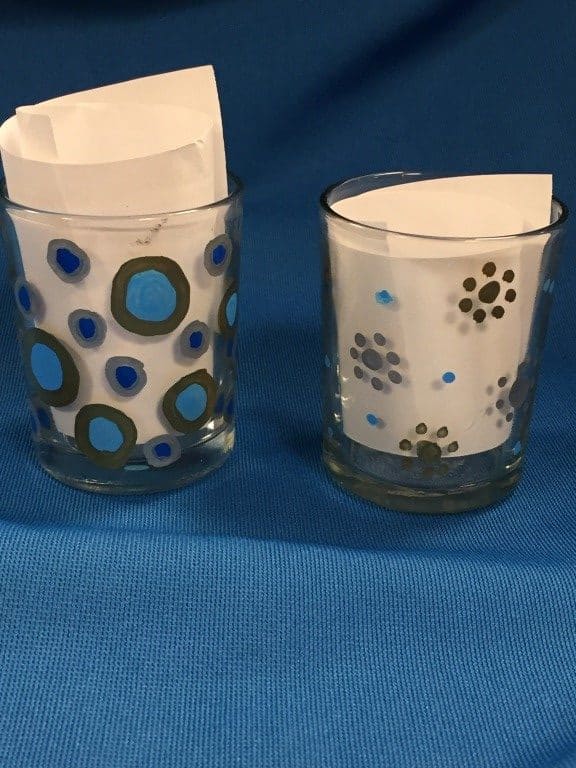 |
Paint Pens These are freehand drawings with the paint pens. No second coat necessary.
|
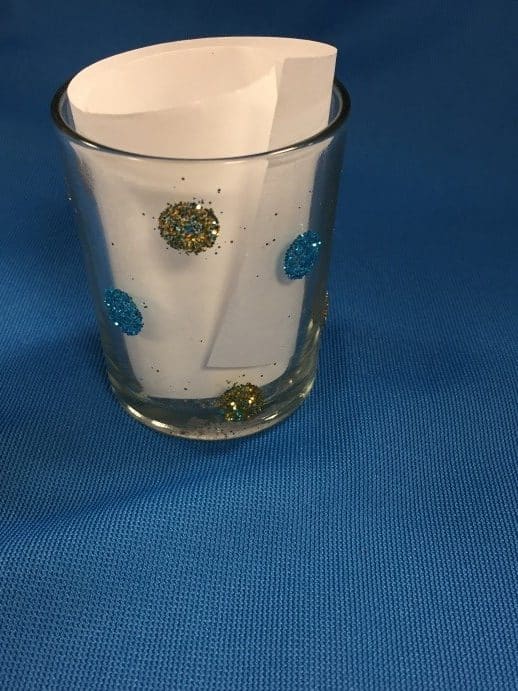 |
Glitter + glue dots Using glue dots makes it really easy to add sparkle! Press the glass against the dot while it’s on the backing paper to adhere it (don’t try to pull it off the backing paper with your fingers—it’s harder and gets misshapen). Pour the fine glitter over the exposed glue dot (or roll it in the glitter). Tap off excess. Fine glitter works best. (See link below for more details) |
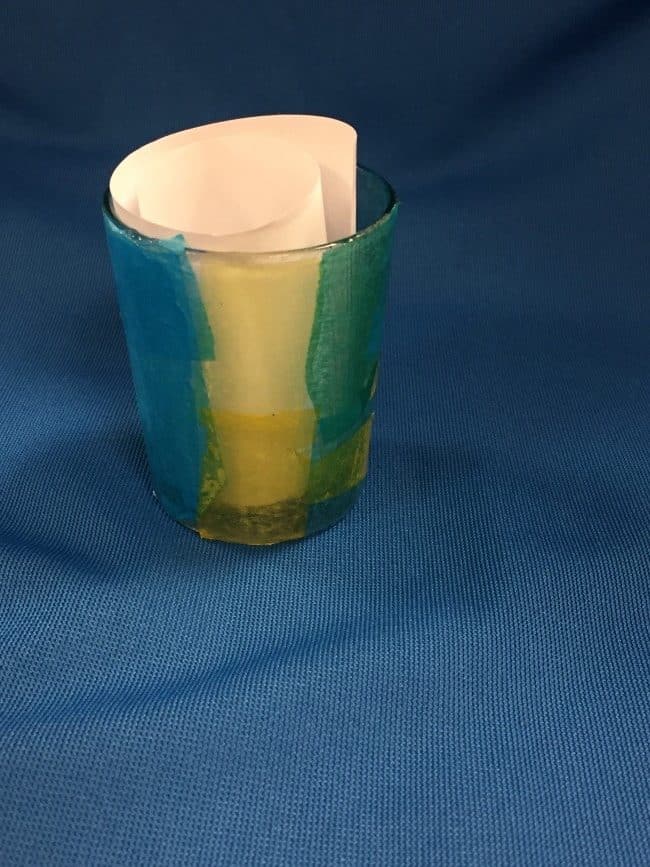 |
Decoupage Have the tissue cut into shapes or into smallish pieces. Use the sponge brush to put on a thin coat of Mod-Podge. Add the tissue—don’t be afraid to layer or overlap at the edges! Apply another coat of Mod-Podge on top to seal it. Let dry thoroughly. |
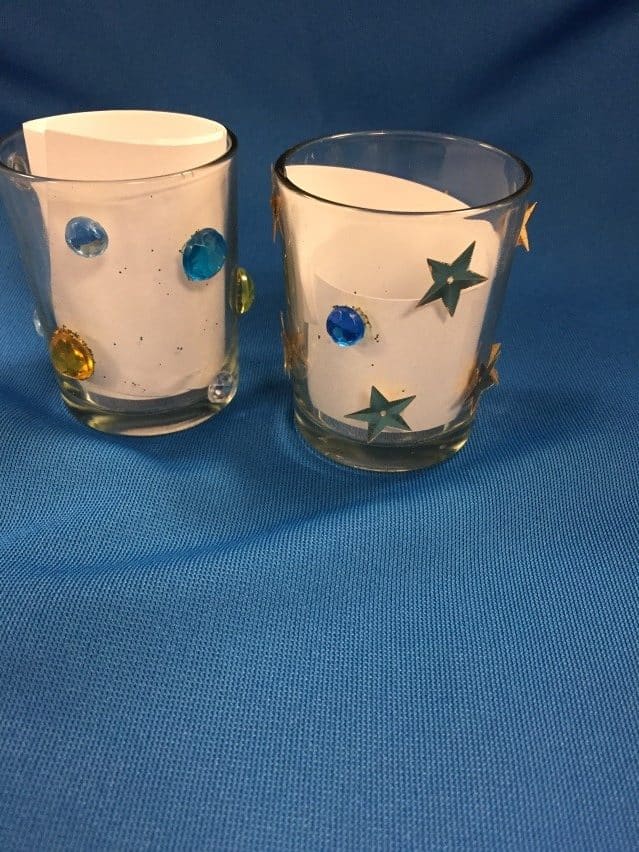 |
Glue dots + rhinestones and sequins Use permanent glue dots to adhere the rhinestones since they’re heavier. Because the jars are round, you don’t want to get giant rhinestones (they’ll stick out). These varied in size between ¼”–½” inch. Press the rhinestone onto the glue dot while it’s on the backing paper. Then lift the rhinestone and glue dot together and press to the glass. For the sequins, I chose to do them “backwards” with the convex (mounded) side against the jar for better adherence and a cool 3-D-type effect. |